Workflow transition interlocks control whether or not a particular workflow transition is visible for execution. Interlocks are created independently of the project definition’s workflow, but are applied by name to the transitions to which the interlocks should apply.
To apply a workflow transition interlock:
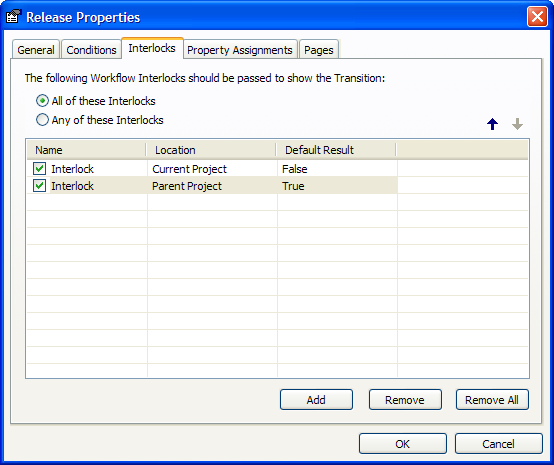
Enable the check boxes for your desired options and use the Add, Remove, and Remove All buttons to configure the options on the Interlocks tab from the descriptions in the following table.
Note Clearing the checkbox next to a condition’s Name is equivalent to clicking the Remove button. The condition will be removed when the OK button is clicked.
| Option | Description |
|---|---|
|
All of these Interlocks |
Requires that all listed interlock conditions be met. Equivalent to applying the Boolean AND operator to the interlocks. |
|
Any of these Interlocks |
Requires that at least one of the listed interlock conditions be met. Equivalent to applying the Boolean OR operator to the interlocks. |
|
Name |
Type the internal name of an existing interlock listed on the Interlocks tab of the project definition. See Configuring interlocks, |
|
Location |
Choose from Parent Project, Current Project, or Topmost Project |
|
Default Result |
Choose from True or False to specify that the transition should be visible (True) or invisible (False) for a project folder in the position configured for the Location criterion in a project/sub-project hierarchy. |
This completes the creation of the interlock conditions of a workflow transition. You can now continue to configure the workflow in any of the following topics.
Related concepts
Related tasks
Creating a project workflow interlock
Creating a document workflow interlock
Configuring workflow state general properties
Creating workflow state property assignments
Configuring workflow transition general properties
Creating a workflow transition condition
Creating a workflow transition property assignment